This article summarizes how to change the DPI and button assignments with images for those who bought a Razer gaming mouse.
If you want to change the settings but don't know how, please refer to this page.
Requires installation of Razer Synapse
To customize some Razer devices, including gaming mice, you need a software called "Razer Synapse." If you have not installed it yet, please download it from the URL below and install it.

After installation, you must create an account and log in. You can also use a Google account, so if you find it troublesome to create a completely new account, you can use that to make things a little easier.
How to change button assignments
First, I will show you how to change button assignments with images. When you start Razer Synapse, you will see a screen like the image below.
The mouse you are using should be displayed under Devices, so click on it.

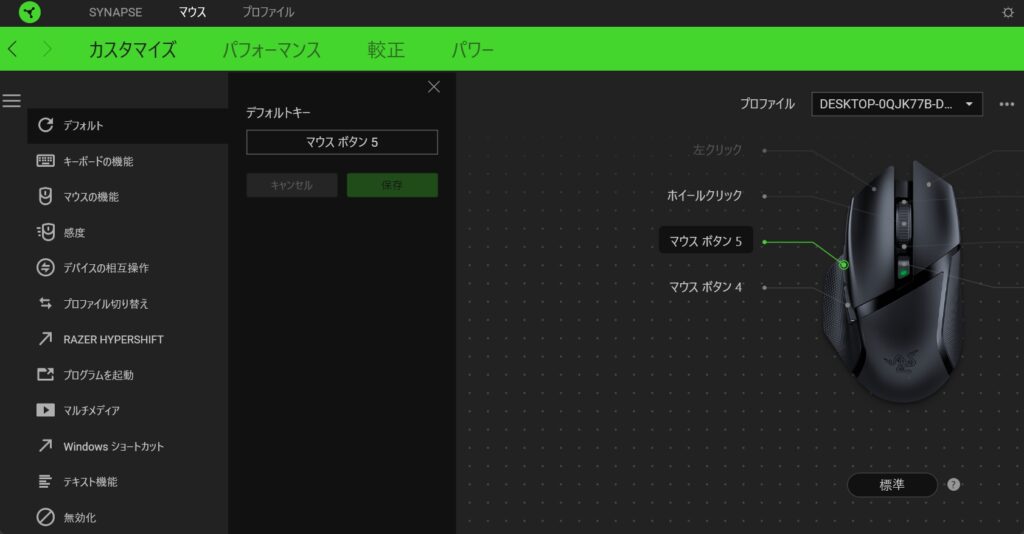
When you click it, you should see a screen like this: If you are on a different screen, click the Customize tab at the top.

When you click on each button, a menu will appear on the left side of the screen.
Select the operation you want to assign to that button from this menu. Since there are too many items, I will not explain them in detail here.
It's good to customize it for games, and I think it's also a good idea to assign shortcuts for things like document creation and video editing.

How to change DPI
Next, we will introduce how to change the DPI with images.
Just like when assigning buttons, click where the Razer gaming mouse you are using is displayed.

Once you click on it, a screen like the one below will appear, so click on the Performance tab at the top.

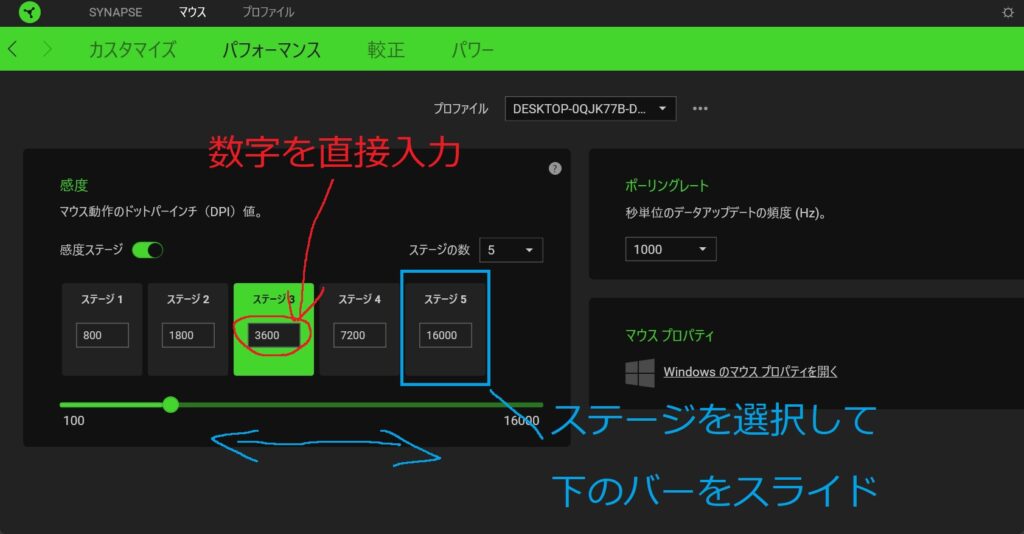
Clicking on the Performance tab will take you to a screen where you can change the DPI.
The number written below the stage is the set DPI value. You can change the value by directly entering the desired value into the numerical value, or by selecting the stage and sliding the bar at the bottom.

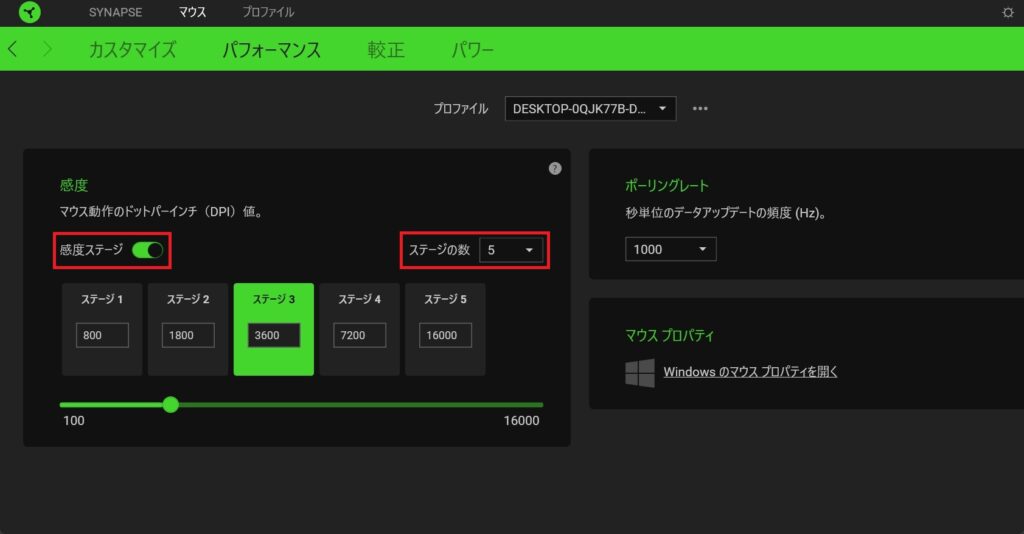
"Stage" is useful when you want to set multiple DPIs and switch them according to the scene, but you can also turn off the DPI and narrow it down to one. You can also reduce the number of stages, so you can set only the DPI that you often use.

summary
This is how to change the DPI and button assignments of Razer gaming mouse.
It's not that difficult, so first install Razer Synapse and play around with it.


comment